
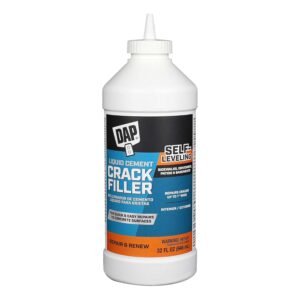
DAP Liquid Cement Crack Filler (Ready to Use), Gray, 32 Oz (7079837584) is a ready-to-pour, self-leveling option for quick repairs on horizontal concrete cracks. I use it on driveways, sidewalks, and garage slabs where I want a clean fill without mixing. The shake-and-pour process keeps the job simple. The gray finish often blends well with existing concrete. I get the best results on clean, dry cracks up to 1/2 inch wide.
Key takeaways
- Ready-to-use liquid formula skips mixing and special tools. I just shake and pour for fast touch-ups.
- Self-leveling action works best on horizontal cracks. It helps me avoid ridges and tool marks.
- Best for routine slab cracks up to 1/2 inch wide. For larger gaps or cracks that keep moving, I switch to a different repair method.
- Quick return to service: I can usually allow foot traffic in 30–45 minutes. Dry time still depends on temperature, humidity, moisture, and how thick I pour it.
- Prep drives results: I apply thin layers over clean, dry concrete to avoid a soft or rubbery final cure.
Overview & Popularity
DAP Liquid Cement Crack Filler (Gray, 32 oz) rates 4.4 out of 5 stars and stays a go-to pick for fast, horizontal concrete crack repairs around the house. I see it used most on driveways and walkways where shallow cracking turns into chipping if left alone. The liquid consistency also helps it flow into tight gaps without special tools, which keeps prep simple and downtime short.
Why homeowners keep buying it
A few practical reasons explain the popularity:
- Quick touch-ups: I can clean the crack, pour, and move on without mixing cement.
- Good for flatwork: It fits the typical hairline-to-small cracks that show up in slabs.
- DIY-friendly packaging: The 32 oz size works well for spot repairs without lots of leftover product.
- Clean results: The gray finish blends better than many clear fillers on older concrete.
For vertical surfaces or wider, moving cracks, I’d pick a different repair approach, but for routine sidewalk and driveway maintenance this product keeps repairs fast and consistent. For a separate quick fix on interior surfaces, I sometimes reference a wall hole repair kit for drywall jobs.
Check current pricing and availability at Amazon here!
DAP Liquid Cement Crack Filler (Ready to Use), Gray, 32 Oz (7079837584)

This image is property of Amazon.com.
Ready-to-Use Application (No Mixing)
I like products that cut steps without cutting results, and this crack filler does that. I don’t mix powders, measure ratios, or hunt for a spare bucket. I just shake the bottle well and pour it right into the crack. That speeds up small repairs and keeps the workflow clean, especially when I’m touching up multiple spots in one session.
How I apply it for consistent flow
I keep the process simple, but I follow a few habits that prevent waste and rework. Here’s what I do before and during the pour:
- Shake the bottle thoroughly so the material flows evenly.
- Pour in a controlled line and let it settle instead of flooding the area.
- Work in short sections so I can monitor fill level and avoid overapplication.
- Cap the bottle promptly between pours to reduce mess and keep the nozzle area clean.
The 32 oz (946.35 mL) bottle size feels practical for routine crack maintenance without leaving me with a bulky container to store.
For a handy companion on patch work, I sometimes keep a wall hole repair kit around for interior dings.
Check current pricing and availability at Amazon here!
DAP Liquid Cement Crack Filler (Ready to Use), Gray, 32 Oz (7079837584)

This image is property of Amazon.com.
Self-Leveling Performance for Horizontal Cracks
I use this filler where gravity can help, since it flows into horizontal cracks and settles flat with minimal fuss. The self-leveling action reduces ridges and trowel marks, so I spend less time reworking the surface and more time finishing the job cleanly. For tip-to-tip results, I stick to a few habits:
How I Get a Smoother Finish
I follow these steps to keep the flow predictable:
- Clean out dust and loose concrete so the bond stays strong.
- Overfill slightly, then let it settle before any final touch-up.
- Work in manageable sections so the bead levels evenly.
- Keep nearby tools simple; if I need a quick patch elsewhere, I’ll grab a wall hole repair kit.
Check current pricing and availability at Amazon here!
DAP Liquid Cement Crack Filler (Ready to Use), Gray, 32 Oz (7079837584)

This image is property of Amazon.com.
Crack Size Capability
I rely on this filler for the cracks I see most often on slabs, walks, and garage floors. It bridges gaps up to 1/2 inch wide, which covers a big slice of everyday surface cracking without forcing me into a full patch-and-resurface job.
How I match crack width to the right fix
I keep decisions simple, then I execute fast with clean prep and the right expectations:
- Up to 1/2 inch wide: I use this product, pack it firmly, and tool it flush so the edges bond well and the finish looks intentional.
- Hairline to 1/8 inch: I still use it, but I work it into the crack aggressively and wipe the surface clean to avoid a visible ridge.
- Over 1/2 inch or missing concrete: I step up to a patching compound or backer material first, since large voids need structure, not just fill.
- Moving cracks: I treat them as control or expansion issues and avoid rigid patch expectations, even if the width falls under 1/2 inch.
For quick wall touchups elsewhere, I’ll grab something like a wall hole repair kit, but concrete needs a filler that’s made for it.
Check current pricing and availability at Amazon here!
Drying & Return-to-Traffic Time
I plan jobs around a 30–45 minute return-to-traffic window, since that’s the typical expectation. Results can vary, though, and I’ve seen customer feedback describe slower drying than anticipated. Temperature, humidity, and how thick I apply the material make the biggest difference. I keep my passes thin and build up in layers so the surface skins over fast and won’t track.
What I do to keep drying predictable
I rely on a few repeatable habits:
- Clean and dry the crack fully; moisture stretches cure time.
- Apply in thin lifts instead of one heavy bead.
- Warm the area on cool days and avoid shaded, damp spots.
Check current pricing and availability at Amazon here!
Final Look & Color Match
I like that this filler dries gray, so it usually blends into typical slabs without extra work. That said, I’ve seen reviews where the cured shade reads a bit off versus what some folks call “standard” concrete, especially on newer, lighter pours.
How I get a cleaner match
A few habits help the repair disappear:
- I test a small spot first, since shade shifts as it cures.
- I feather the edges with a putty knife so the patch doesn’t telegraph.
- I keep texture consistent by finishing in the same direction as the surrounding trowel marks.
- I wait for full cure before judging color, then consider a concrete stain if needed.
For unrelated home fixes, I’ve also used a wall hole repair kit. Check current pricing and availability at Amazon here!
Durability & Set Results (Customer Notes)
I see two consistent themes in customer notes: finish quality can range from clean and solid to disappointingly soft, and adhesion depends heavily on prep and placement. Reports of a smooth, hard set usually come from thin applications in stable conditions. Complaints about a soft fill weeks later often point to overfilling, moisture, or movement in the crack.
What I watch for to get a solid cure
I keep results predictable by controlling the variables customers mention most often:
- Crack condition: I clean out dust, loose concrete, and old sealant so the filler can bite.
- Depth management: I don’t try to pack deep voids in one pass; I build in layers so the center can cure.
- Moisture check: I avoid applying if the slab or crack edges feel damp, since trapped moisture can keep the fill rubbery.
- Movement zones: I don’t expect lasting hardness at expansion joints or highly flexing areas; those need a flexible approach.
- Tooling the surface: I smooth it right after filling to reduce ridges and help it blend visually.
For small cosmetic touch-ups nearby, I sometimes pair the repair with a quick wall patch like this all-in-one repair kit to keep the whole project looking finished.
Check current pricing and availability at Amazon here!
Versatility, Paintability & Water Resistance
I can use this crack filler inside or outside, so it works for basements, garages, patios, and slab edges without switching products mid-project. It holds up well around damp areas because it’s water resistant once it sets, which helps reduce repeat repairs after rain or routine washdowns. I still avoid applying it in active water flow, and I let the surface dry before I start so the bond stays strong.
Paint-ready results with a clear cure window
I plan my finish work around the listed 24-hour full cure time, since paint and moisture exposure both perform better after that point. To keep the final look consistent, I follow a simple workflow:
I feather the edges while it’s workable, so the patch disappears after paint.
I wait for full cure, then paint with latex or oil-based coatings for a uniform sheen.
I spot-prime if the surrounding surface is porous or stained, so the topcoat doesn’t flash.
I like that I can match existing wall or floor colors without special coatings, which makes touch-ups faster on both interior walls and exterior concrete faces. Check current pricing and availability at Amazon here!
Common Keywords / Phrases
How I use these phrases in real projects
I look for ready-mixed and shake and pour when I want speed with fewer tools. Self leveling and horizontal concrete cracks signal it’ll flow flat on driveways, garage floors, and sidewalks. I plan around ready for traffic 30–45 minutes to reopen access fast. For fit, fills up to 1/2 inch tells me the crack width range it can bridge in one pass. I also check dries gray so the repair blends with typical slabs. 32 oz. helps me estimate coverage and avoid running short mid-pour. If I also need wall patching elsewhere, I pair it with a wall hole repair kit to keep one cleanup routine.
Check current pricing and availability at Amazon here!
Disclosure: As an Amazon Associate, I earn from qualifying purchases.

From Scranton, Pennsylvania. Former contractor who hates flimsy repair kits. Reviews tools by whether they actually solve the problem or just hide it temporarily.


