
The Sugelary Drywall Patch Repair Kit is a 5-piece spackle-and-scraper set for quick, clean fixes on small indoor damage, and it shines most on white walls where minor marks show immediately. You use it for nail and screw holes, scuffs, shallow dents, plaster dings, and light wood scratches, and you get the best finish by spreading the paste smoothly in thin layers, controlling flow, and feathering the edges to avoid ridges and even prevent tube blowouts.
Key takeaways
- Best use case: Minor touch-ups (nail holes, chips, scratches, shallow dents) and fast pre-move-out or pre-showing fixes, not large voids.
- What’s included: 100g repair paste, a nozzle extender, a scraper, gloves, and sandpaper—so you can fill, smooth, and blend without extra tools.
- Application method: Apply thin layers and feather edges with the scraper/putty knife to keep patches flatter, reduce sanding time, and improve paint blending.
- Finish quality: The paste grips well for quick repairs, but you still get the cleanest finish if you fully dry it, then sand lightly; prime if the patch “flashes” under paint.
- Main pain point + fixes: Stiff dispensing or tube splitting—warm the tube, roll it from the bottom, squeeze slowly, and keep the cap/nozzle clean to prevent clogs.
Overview & Best Use Cases
I use the Sugelary Drywall Patch Repair Kit as a quick, clean fix for small interior wall damage. It holds a 4.4-star rating and works best on white walls where tiny defects stand out fast. The compound spreads smoothly and suits renters, DIYers, and pros who need a dependable touch-up between full repaints.
Where it shines
I reach for it in these common scenarios:
- Nail and screw holes from frames, hooks, and shelves
- Paint chips, scuffs, and scratches near doors and switches
- Shallow dents and minor dings from chairs or vacuum bumps
- Fast fixes before photos, showings, or move-out checks
For bigger voids, I pair it with a wall hole repair kit, then finish with a touch-up paint pen. Check current pricing and availability at Amazon here!
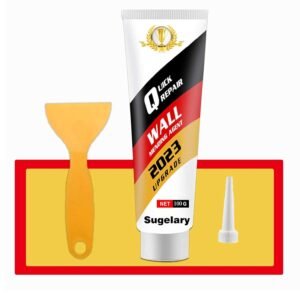
Sugelary Drywall Patch Repair Kit with Scraper, Wall Spackle Paste, Mending Agent Quick and Easy Solution to Fill The Holes for Home Wall, Plaster Dent and Wood Scratch Repair

This image is property of Amazon.com.
What’s Included (5-Piece Set)
I like this 5-piece set because it covers the basics for fast, clean wall fixes without extra trips to the store. The kit gives me enough material and tools to patch small dents, nail holes, and minor chips.
Contents and how I use them
Here’s what comes in the box and where each piece pays off:
- 100g (3.52 oz / 100 mL) wall repair paste for filling and shaping
- Nozzle extender to push paste into tight divots and cracks
- Scraper to smooth the surface and feather edges
- 2 rubber gloves to keep hands clean and grip steady
- Sandpaper for a quick final blend before paint
For bigger voids, I pair it with the 3M wall hole repair kit, then finish color matching with a refillable touch-up paint pen. Check current pricing and availability at Amazon here!
Sugelary Drywall Patch Repair Kit with Scraper, Wall Spackle Paste, Mending Agent Quick and Easy Solution to Fill The Holes for Home Wall, Plaster Dent and Wood Scratch Repair
This image is property of Amazon.com.
Application & Finish Quality
I spread this paste fast and with good control. The texture lets me push it into dents and small gouges without fighting drag, so I can build thin layers instead of one thick, crack-prone blob. I keep a small putty knife handy and work the edges first, then fill the center. A clean scrape matters as much as the paste itself, since the last pass is what sets up a smooth, paint-ready face.
How I get a smooth finish
I stick to a repeatable routine that keeps the surface flat and saves sanding time:
- I load less than I think I need, then add a second skim if the wall still dips.
- I hold the knife at a low angle and feather the perimeter to avoid a visible ridge.
- I wipe the blade often so dried bits don’t carve lines.
- I let it set, then do one final light scrape to level high spots.
For pinholes or hairline gaps, I’ll pair it with a wall hole repair kit. If the patch sits in a high-visibility area, I finish with a touch-up paint pen to blend edges cleanly.
Check current pricing and availability at Amazon here!
Sugelary Drywall Patch Repair Kit with Scraper, Wall Spackle Paste, Mending Agent Quick and Easy Solution to Fill The Holes for Home Wall, Plaster Dent and Wood Scratch Repair

This image is property of Amazon.com.
Adhesion & Blending Results
The compound grips well and stays put, even on quick touch-ups. I get the best blend after I smooth the fill, let it dry fully, then do a light sand. Small dings can fade into the wall and look virtually invisible once paint goes on.
How I get clean blend lines
I follow a short routine to keep edges tight and the patch flat:
- Feather the perimeter with a putty knife while it’s still workable.
- Sand lightly with fine grit to level the sheen and remove ridges.
- Prime if the patch flashes, then match paint for a consistent finish.
- For holes, I pair it with this wall hole repair kit.
- For color touch-ups, I use a refillable paint pen to avoid halos.
Check current pricing and availability at Amazon here!
Sugelary Drywall Patch Repair Kit with Scraper, Wall Spackle Paste, Mending Agent Quick and Easy Solution to Fill The Holes for Home Wall, Plaster Dent and Wood Scratch Repair

This image is property of Amazon.com.
Common Complaint: Tube Dispensing Issues
Some buyers run into a simple but annoying issue: the paste can feel hard to squeeze out. I’ve also seen reports where extra pressure makes the tube split at the crimped end, which turns a quick fix into a cleanup job.
How I prevent jams and blowouts
I keep dispensing controlled, even when the tube feels stubborn, by doing a few practical things:
- I warm the tube in my hands for a minute before use, then squeeze slowly instead of forcing a big push.
- I roll from the bottom with a clip or a flat tool, so pressure stays even and doesn’t spike at one point.
- I avoid bending the tube near the seam; I keep it straight and let the paste move forward gradually.
- I cap it tightly right after use to reduce drying at the nozzle, which can make the next squeeze worse.
- If I need a cleaner option for tiny dings, I’ll grab a refillable touch-up paint pen instead of wrestling a tube.
For bigger patch jobs where I want a more controlled application, I’ll also consider an all-in-one wall repair kit that meters material better.
Check current pricing and availability at Amazon here!
Sugelary Drywall Patch Repair Kit with Scraper, Wall Spackle Paste, Mending Agent Quick and Easy Solution to Fill The Holes for Home Wall, Plaster Dent and Wood Scratch Repair

This image is property of Amazon.com.
Drying Time & Cold-Weather Tip
Drying time varies a lot. I’ve seen it set fast on warm, dry days, yet feel overly dry or draggy in cooler rooms, which makes smoothing harder. I plan small batches and work in thin layers so I can feather edges before it firms up.
Temperature fixes that actually help
To keep results consistent, I rely on a few habits:
- Cold-weather flow: the brand suggests mixing about 5 mL of hot water, then shaking the tube to loosen the paste.
- Keep the cap clean so chunks don’t speed up drying at the nozzle.
- For tiny dings, I switch to a touch-up paint pen after it cures.
- For deeper holes, I pair it with a wall hole repair kit.
Check current pricing and availability at Amazon here!
Value for Money
I judge value here by how often I’ll actually reach for it. For small dings and quick touch-ups, it can feel like a smart buy because it saves time, setup, and cleanup. I can patch a few nail holes, smooth the surface, and get on with painting fast. That said, value drops fast if the tube fights me. If dispensing takes effort or clogs mid-job, I waste product and patience, and the price stings.
How I decide if it’s worth it
I use a few simple checkpoints before I commit to this kind of repair tube:
I buy it for minor repairs, not big patches. Larger fills usually need a knife-applied compound.
I test dispensing right away. If flow feels inconsistent, I’d rather switch products than force it.
I keep a backup option for speed. A kit like the all-in-one wall hole repair kit helps when I need predictable results.
I pair it with clean touch-up coverage. A refillable touch-up paint pen keeps the finish work quick and controlled.
Check current pricing and availability at Amazon here!
Disclosure: As an Amazon Associate, I earn from qualifying purchases.

From Scranton, Pennsylvania. Former contractor who hates flimsy repair kits. Reviews tools by whether they actually solve the problem or just hide it temporarily.


