
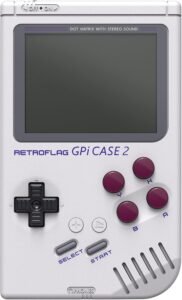
The Retroflag GPi Case 2 turns a Raspberry Pi CM4 (Lite or eMMC) into a console-style handheld with an all-in-one chassis: a 3.0-inch 640×480 TFT LCD, full controls, a 4000mAh Li-ion battery, and USB-C charging. Reviews are generally positive (4.1/5 from 164 reviews), but the execution can feel uneven—especially around unit-to-unit variation, potential screen defects (like dead pixels), and the time needed for setup plus early fit/power checks.
Key takeaways
- Designed for Raspberry Pi Compute Module 4 (Lite and eMMC), which usually means less time spent on compatibility and wiring than a typical DIY handheld stack.
- 3.0-inch 640×480 TFT LCD is a good match for retro systems, but there are reports of dead pixels and other panel defects—so it’s smart to run a quick screen test right after the first boot.
- 4000mAh battery gets a lot of praise; in real-world use, 2–3 hours is a reasonable expectation depending on brightness, volume, and emulation load.
- USB-C charging and a 3.5mm headphone jack improve daily carry; the jack is especially useful for simple, low-latency audio during handheld play.
- “Tool-free” install usually works, but careful alignment and connector seating matters—then verify power, buttons, and charging early in case durability issues show up.
Overview & Ratings
The Retroflag GPi Case 2 pairs a Raspberry Pi CM4 with a 3.0-inch LCD, a 4000mAh battery, and USB-C charging. I like the concept for a clean, console-style handheld that’s easy to pick up and play. User sentiment sits at a 4.1/5 star rating from 164 reviews, and that’s the right signal: strong idea, mixed execution.
What I focus on before buying
I keep expectations realistic and plan for some variability between units. Here’s how I approach it:
- I compare other enclosures like the Flirc Pi 5 case for build-quality expectations
- I budget time for initial setup and troubleshooting
- I verify fitment and power behavior early, so I can swap or return fast
Check current pricing and availability at Amazon here!
Retroflag GPi Case 2 for Raspberry Pi CM4, with 3.0” LCD and 4000mAh Li-on Rechargeable Battery, Type C Charging Port and Pi Easy Install

This image is property of Amazon.com.
Designed for Raspberry Pi CM4 (Lite/eMMC)
This handheld case targets the Raspberry Pi Compute Module 4 in both Lite and eMMC variants, so I can drop in a CM4 I already own and skip the usual parts hunt. The big win is integration. I get a single chassis that brings the screen, controls, and battery into one portable, retro-style build, which keeps wiring clean and reduces the project sprawl that often slows handheld builds.
What I like about the CM4 fit
A few practical points make this a solid pick for quick builds and repeatable results:
- CM4 Lite or eMMC flexibility: I can choose microSD convenience or faster, cleaner onboard storage.
- Fewer compatibility headaches: I don’t have to match a random display, driver board, and power stack.
- Cleaner portability: A consolidated layout usually means fewer loose connectors to work free during travel.
- Great alongside other Pi-5 setups: For my desk builds, I’ll still use options like the FLIRC Raspberry Pi 5 case or the Argon ONE V3 NVMe case, while this covers handheld duty.
I treat this as the fast path to a polished CM4 handheld, similar in spirit to a ready-made retro display piece like this LEGO Super Mario Game Boy set review, but built to play.
Check current pricing and availability at Amazon here!
Retroflag GPi Case 2 for Raspberry Pi CM4, with 3.0” LCD and 4000mAh Li-on Rechargeable Battery, Type C Charging Port and Pi Easy Install
This image is property of Amazon.com.
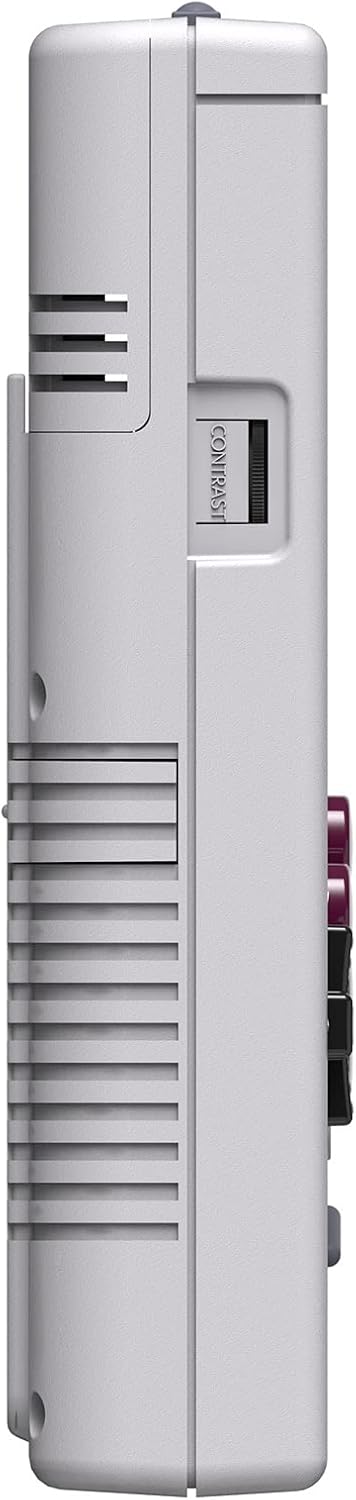
3.0-inch 640×480 TFT LCD Screen
I like the GPi Case 2’s 3.0-inch 640×480 TFT LCD for handheld retro play. The resolution fits classic systems well, and the size keeps games readable without making the unit bulky. Feedback stays mixed, though. Some owners praise color and sharpness, while others report dead pixels that stand out on solid backgrounds.
What I do before committing
I keep a quick evaluation routine:
- Run full-screen solid colors to spot dead pixels fast.
- Check brightness at low and high levels for backlight bleed.
- Test fast scrolling to gauge ghosting.
- Compare display comfort against builds like the FLIRC case setup.
Check current pricing and availability at Amazon here!
Retroflag GPi Case 2 for Raspberry Pi CM4, with 3.0” LCD and 4000mAh Li-on Rechargeable Battery, Type C Charging Port and Pi Easy Install
This image is property of Amazon.com.
4000mAh Rechargeable Battery Life
I like that this handheld runs on a 4000mAh Li‑ion rechargeable battery, because it keeps the setup simple and portable. Battery life is the feature I see praised the most, and real-world use tends to land around 2–3 hours depending on what I’m doing. Brightness, volume, and heavier emulation will pull runtime down, while lighter retro titles usually stretch it out.
How I get the best runtime in practice
A few quick habits make the battery feel noticeably bigger day to day:
I drop screen brightness a couple of steps and set a short sleep timer.
I keep volume moderate and use wired audio when I can.
I close background features I’m not using and avoid max-performance modes unless a game needs it.
I top up with a quality 5V charger and don’t store it fully drained.
For a different kind of portable project, I also keep a Raspberry Pi 5 build in a compact case like the FLIRC Pi 5 case, since thermals can impact sustained performance.
Check current pricing and availability at Amazon here!
Retroflag GPi Case 2 for Raspberry Pi CM4, with 3.0” LCD and 4000mAh Li-on Rechargeable Battery, Type C Charging Port and Pi Easy Install

This image is property of Amazon.com.
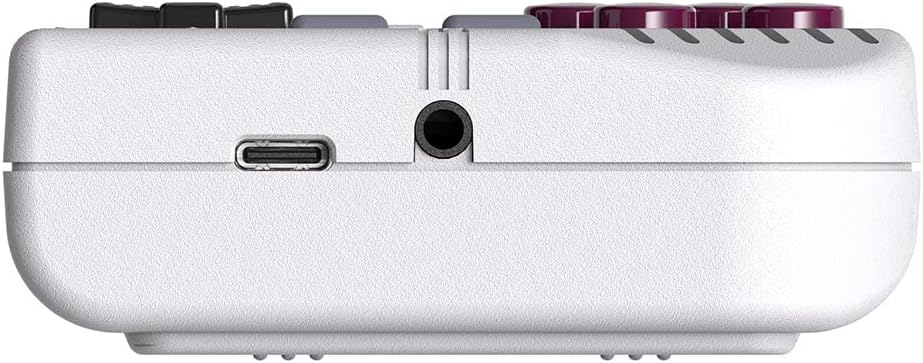
USB-C Charging & 3.5mm Headphone Jack
USB-C charging keeps my setup simple and consistent with the cables I already carry. I plug in anywhere, top off quickly, and keep playing without juggling older connectors. I also like that the 3.5mm headphone jack stays onboard, since wired audio avoids pairing hiccups and keeps latency low during handheld sessions.
How I get the most out of it
A few habits help me keep power and audio reliable:
I use a known-good USB-C PD charger and a short, quality cable.
I pick comfortable wired earbuds so the jack stays snug during movement.
I store the unit in a protective case; the FLIRC case option shows the kind of fit I look for.
Check current pricing and availability at Amazon here!
Retroflag GPi Case 2 for Raspberry Pi CM4, with 3.0” LCD and 4000mAh Li-on Rechargeable Battery, Type C Charging Port and Pi Easy Install
This image is property of Amazon.com.
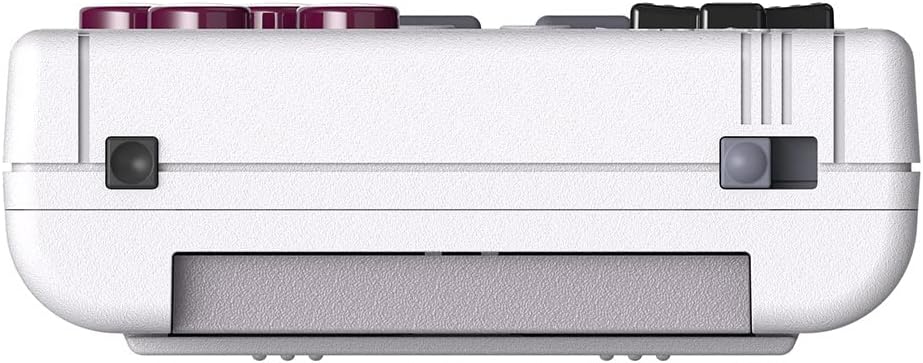
Extra Controls: Turbo, Hotkey, and Save Energy
I rely on the extra controls to make sessions smoother. Turbo handles repetitive taps fast, which helps in platformers and shooters. Hotkey gives me quick access to common functions without digging through menus, so I keep focus on the game.
How I use these buttons day to day
A few habits help me get the most out of them:
- I map Turbo to “confirm” or “fire” when grinding or farming, then switch it off for precision sections.
- I set Hotkey for my most-used shortcut, like quick menu or overlay, so it stays consistent across emulators.
- I hit Save energy during pauses or slow sections to stretch play time, especially on trips.
For other compact gear setups, I also reference the Argon ONE V3 case review. Check current pricing and availability at Amazon here!
Retroflag GPi Case 2 for Raspberry Pi CM4, with 3.0” LCD and 4000mAh Li-on Rechargeable Battery, Type C Charging Port and Pi Easy Install
This image is property of Amazon.com.
Tool-Free Installation (But Expect Some Tinkering)
Installation claims “tool-free,” and I can usually get it assembled without reaching for a driver. Still, I plan for some hands-on fiddling, especially on first CM4 builds where alignment and connector seating matter. I treat the first fit as a dry run, then reseat everything once cables and headers settle.
What I do to keep it smooth
A few habits cut frustration fast:
- I press the CM4 into place evenly, then recheck before closing.
- I route cables with slack so panels don’t fight the fit.
- I test boot before final closure to avoid reopening.
- I compare enclosure tolerances against options like the Flirc Pi 5 case if I want simpler access.
Check current pricing and availability at Amazon here!
Retroflag GPi Case 2 for Raspberry Pi CM4, with 3.0” LCD and 4000mAh Li-on Rechargeable Battery, Type C Charging Port and Pi Easy Install
This image is property of Amazon.com.
Durability & Handling Concerns
A few buyers report breakage after removing the card, so I treat durability as the main risk. I avoid flexing the board, I pull straight, and I use slow pressure during removal. I also limit how often I disassemble once everything works, since repeated cycles add stress.
How I handle assembly and removals
I stick to a simple routine to cut failures:
- Power off, discharge static, and work on a flat surface.
- Grip edges, not components, and avoid twisting while extracting the card.
- Use the right driver bit and stop when screws seat.
- If I need frequent access, I pick a case with easier service like the Argon ONE V3 case or a simple option such as the FLIRC case.
Check current pricing and availability at Amazon here!
Who It’s Best For
I position this handheld as a strong fit for Raspberry Pi Compute Module 4 owners who want a compact retro build without the bulk of a full-size Pi setup. The 3-inch display keeps the footprint small, while USB-C charging and the 4000mAh battery make it easy to grab and go for quick sessions or travel.
My fit checklist
I use a short checklist to decide if it matches the build style and risk level I’m comfortable with:
- I already own (or can source) a CM4 and I’m fine doing light assembly and setup.
- I want a handheld-first form factor instead of a desktop case like this Flirc Pi 5 case.
- I value portability over expandability, so I don’t need dual NVMe storage like a Pironman 5 Max build.
- I can live with some unit-to-unit quality variance, including potential screen defects like dead pixels.
Reliability expectations
I treat this as an enthusiast handheld, not a guaranteed-perfect consumer device. I plan for basic inspection on arrival, quick pixel checks, and a return window strategy if the panel or controls show issues. Check current pricing and availability at Amazon here!
Disclosure: As an Amazon Associate, I earn from qualifying purchases.

From San Jose, California. Former IT support lead who has seen unspeakable things plugged into USB ports. Reviews electronics with zero patience for bad firmware.


